Thank you for volunteering to make a quilt for a person in need. Download our online instructions to ensure your creation will be suitable for our patients, click here. You can also read the same instructions, online below.
Each kit should contain:
15 – 6.5” squares of main fabric
3 – 3.5” strips of coordinating fabric A
3 – 3.5” strips of coordinating fabric B
4 – 3.5” strips of outside border fabric
4 – 1.5” strips of inner border fabric
1 – 54” fabric for the backing
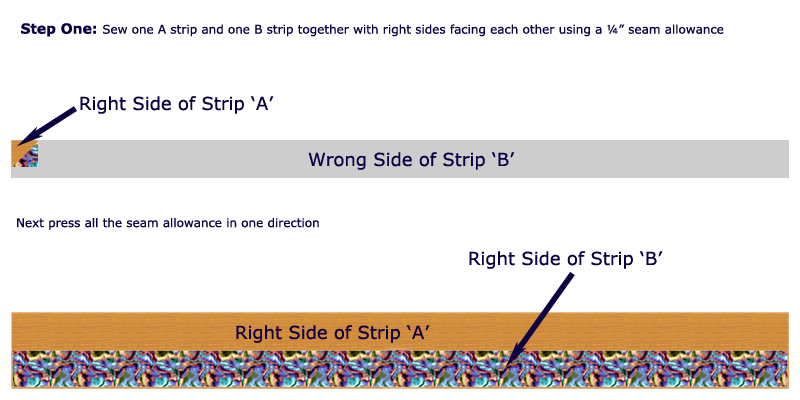
Step One: Sew one A strip and one B strip together with right sides facing each other using a ¼” seam allowance. Press all the seam allowance in one direction. Repeat this to make 3 sets. Please note that the outside border strips are the same width, but there are 4 strips. See Step Five.
Step Two: Cut the 3 sets of strips into 30 pieces that measure 3.5” by 6.5’ rectangles. Then sew the 30 pieces together to create 15 pieces that measure 6.5” by 6.5”. You have now created the coordinating square for your main fabric.

Step Three: Sew your 15 new squares to your 15 main fabric squares in an alternating pattern. The squares will be 5 across and 6 down like a checkerboard. Make sure all your squares are going in the same direction to create a patchwork pattern. Press all seam allowance in one direction. Your quilt should now be 30.5” by 36.5”.
Step Four: Place 2 of the inner border fabric strips face to face with the quilt sides and sew together. Place the other 2 strips face to face with the top and bottom of the quilt and sew together. Press all seams in one direction.
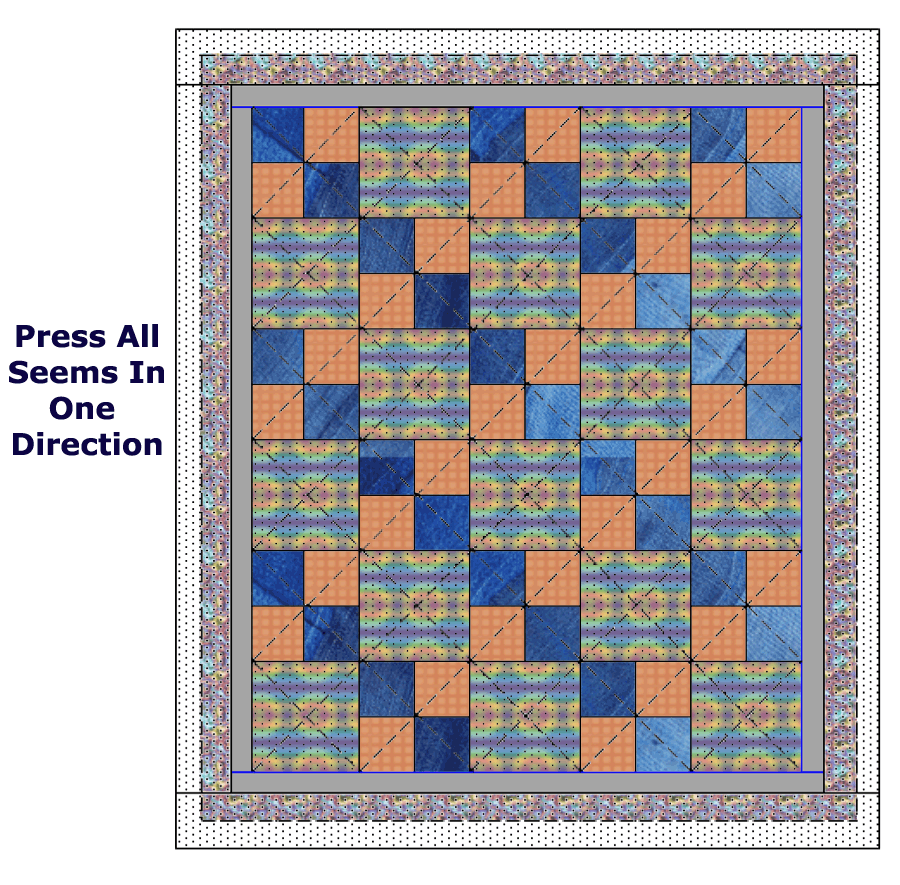
Step Five: Repeat Step Four for the outer border strips. Your quilt should now measure 38.5” by 44.5”
Step Six: The next step can be done a number of ways:
Pillowcasing: Place the backing fabric face down over your newly made quilt. Add a layer of quilting batting on top of wrong side of backing fabric( we recommend a ¼ inch low loft batting) and pin all layers together. Stitch around all four sides leaving a small opening to turn the quilt right side out. Sharpen your corners and press all sides. Hand stitch your opening shut and begin machine quilting.
Binding: Place the backing fabric face down. Add a layer of batting and then place the newly made quilt face up on top. Pin all layers and baste all four sides. Bind the quilt with binding tape. Begin machine quilting.
OR: Cut your backing fabric 1” larger on all sides to create a binding. Trim batting to the quilt face dimensions and then create a binding by bringing the backing fabric around to the front and pressing raw edges under to create a ½” wide band. Top stitch or zig zag close to the edge. Begin machine quilting.
A patch represents each of us and when sewn together, we can change the world.
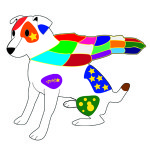
PATCHES
Patches is a mascot for Kind Quilts. He is made from pieces of fabric, which represent each of us and when sewn together represent all of us. All of us together can make a difference!
